In this article:
Reporting Sickness & Returning to Work
Access
Access Cintra People - Leave by going to app.appogeehr.com. There are three ways to log in - Email address and Password, Google Workspace (G Suite) Log in or Office 365 Log in. Your details will be in your welcome email, or alternatively contact your administrator.
Once you're logged in, you'll be presented with the Dashboard, this shows your Leave Summary and a calendar of Who's off.
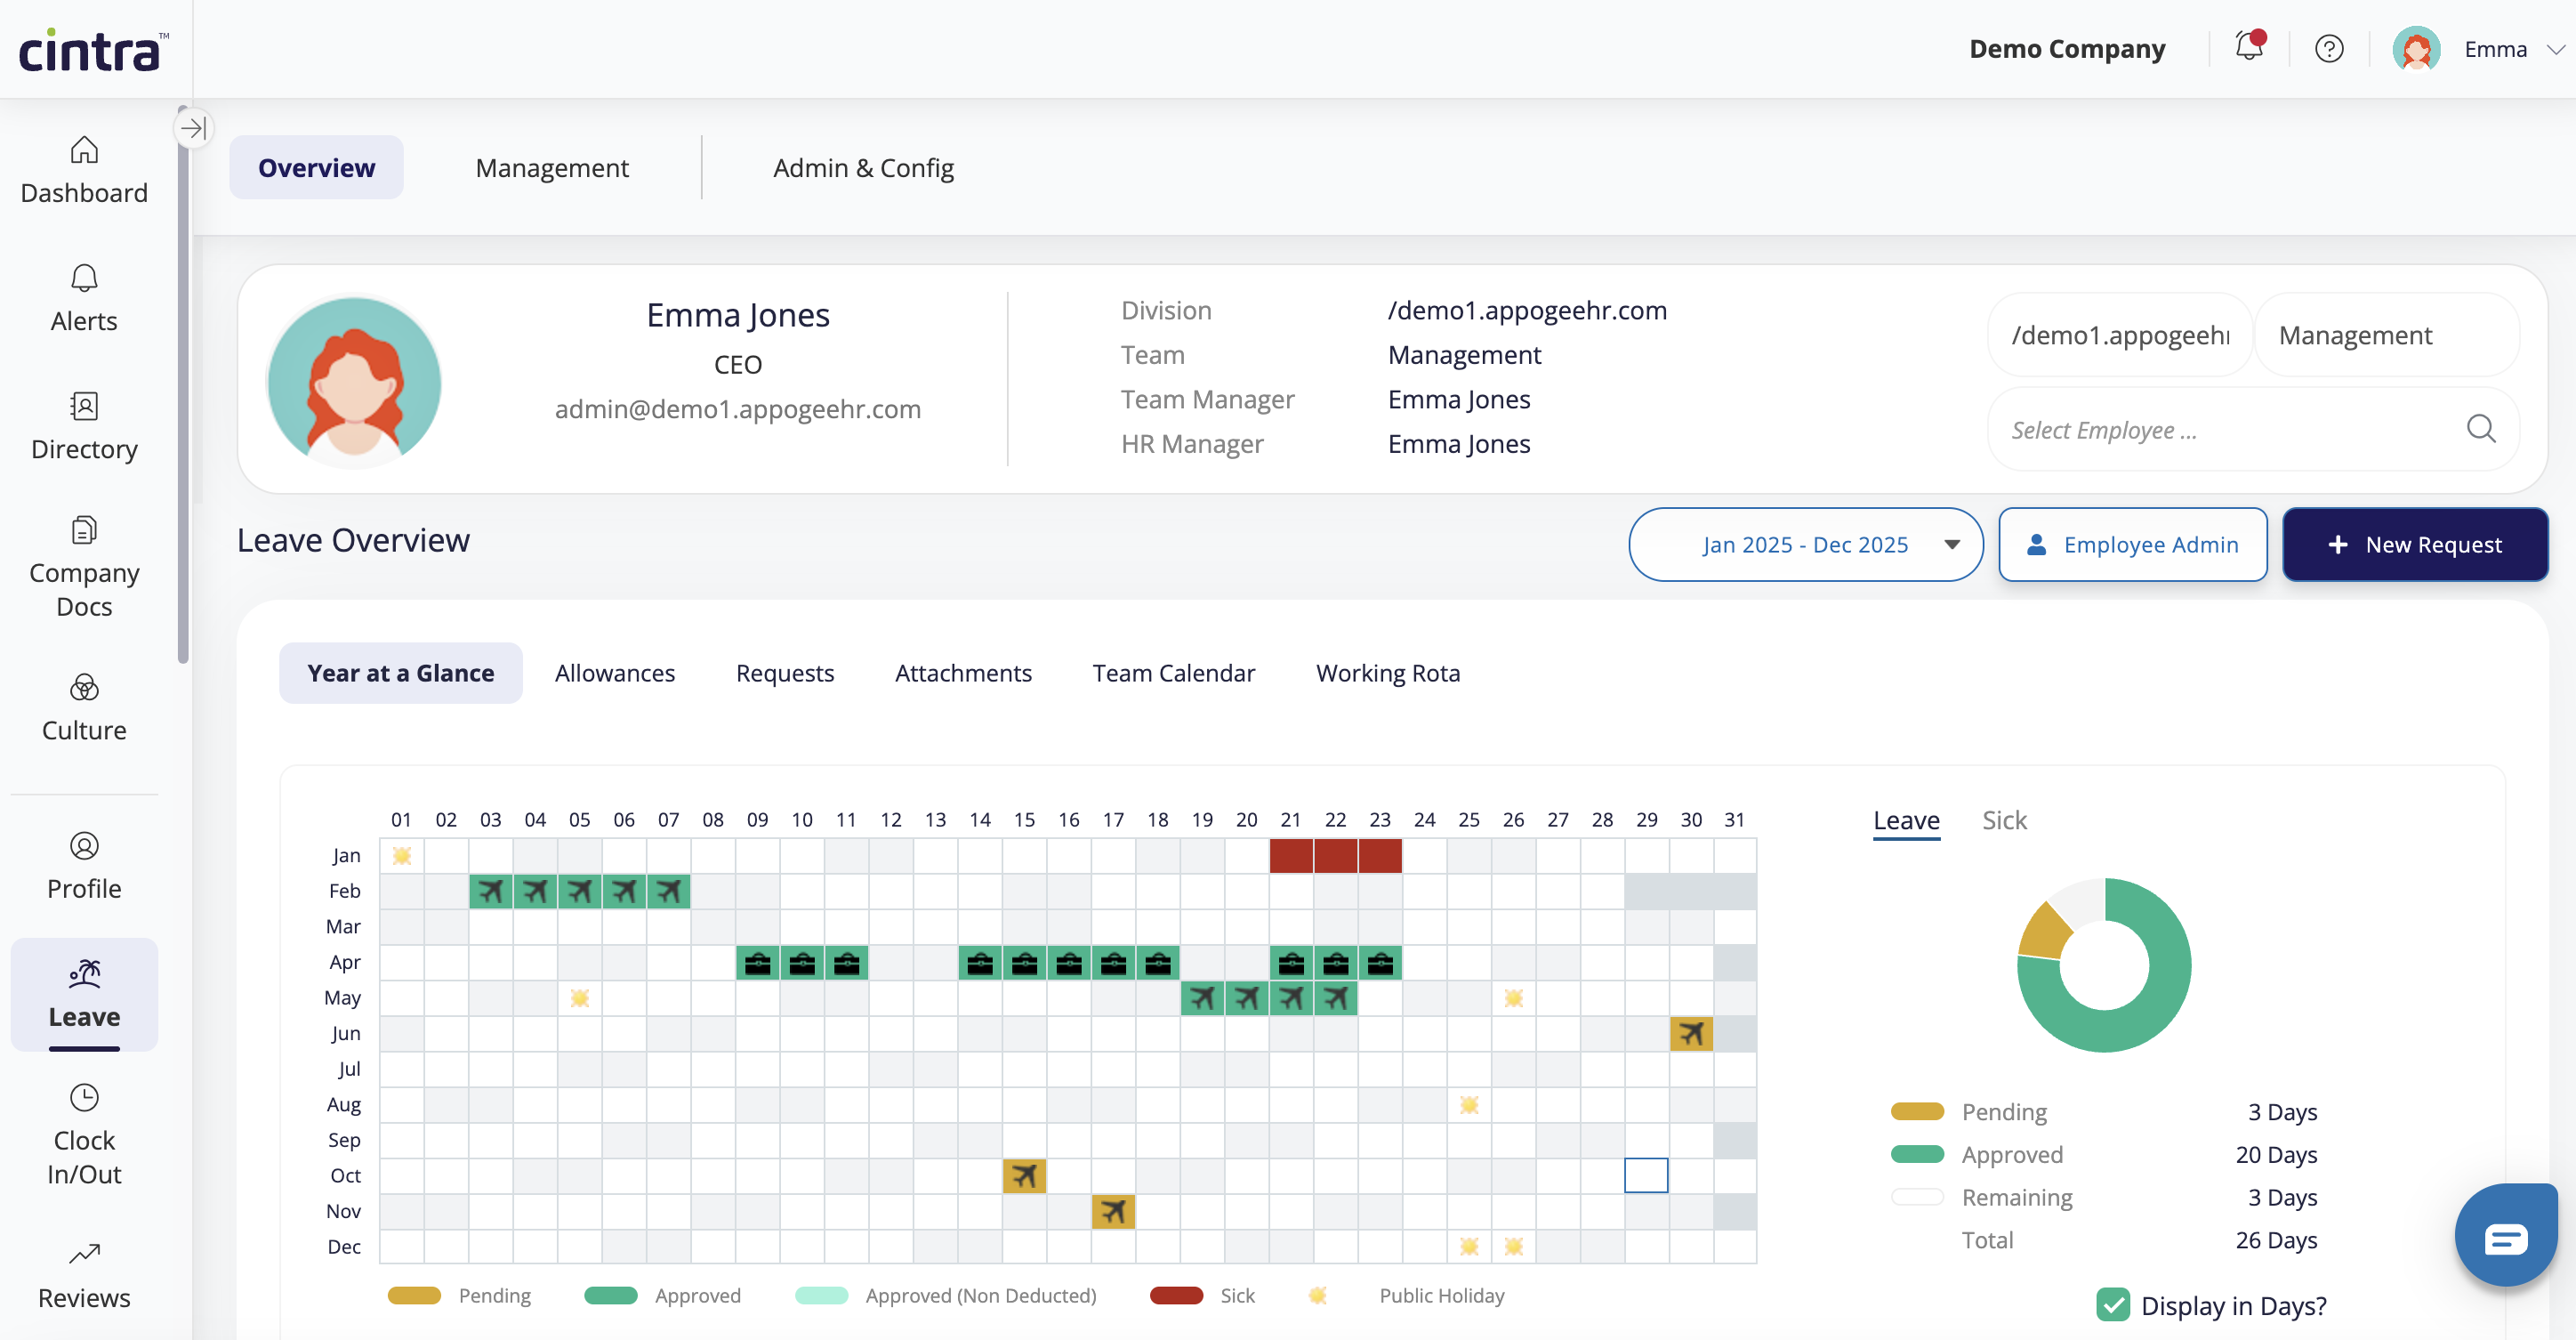
Your Leave will be shown in the Year at a Glance feature on the Dashboard.
Approved Leave shows in Green
Pending Leave shows in Orange
Sickness shows in Red.
There's an allowances donut on the right, which shows you how much of your allowance is used up.
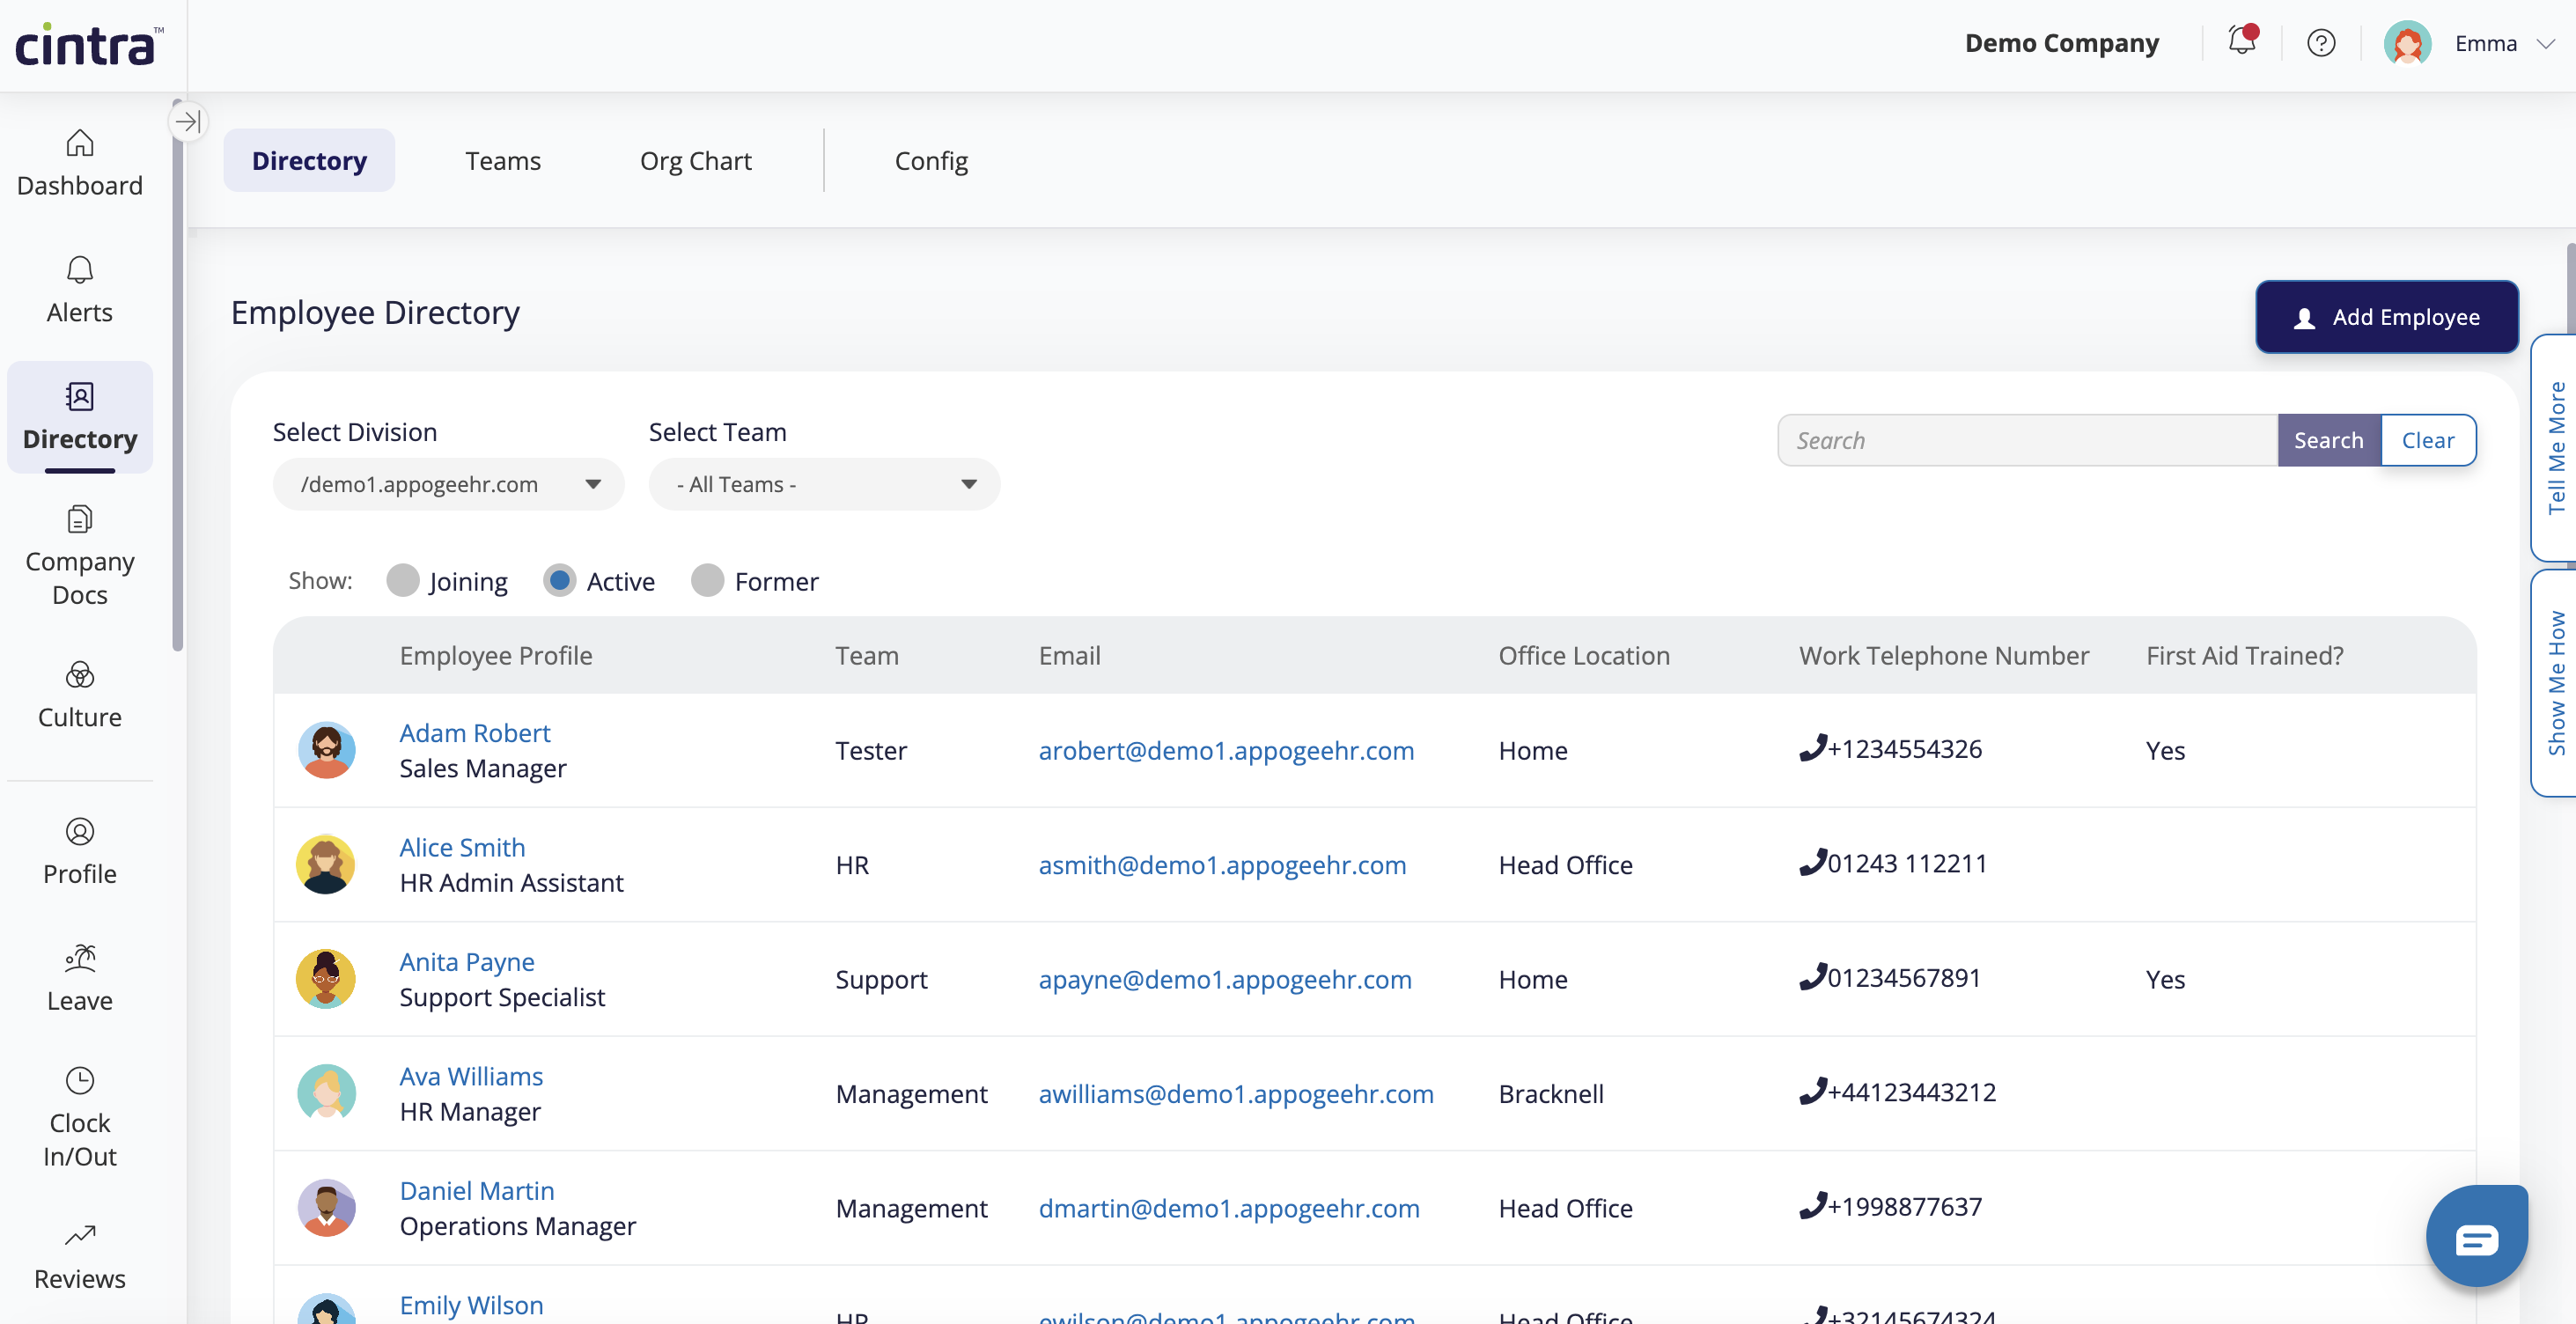
Directory
The Directory is where you can find other employees in your organisation. There's three ways you can view this - a grid, a list or as the Org Chart. Use the icons in the top right corner to toggle between list and grid, switch between tabs to get to the Org Chart showing the teams and their managers and click show members to see the teams.
Employee Directory
Org Chart

Leave
If you go to your Leave Overview, you'll see the Year at a Glance calendar again, as well as other options - Requests, Allowances, Attachments & Team Calendar.
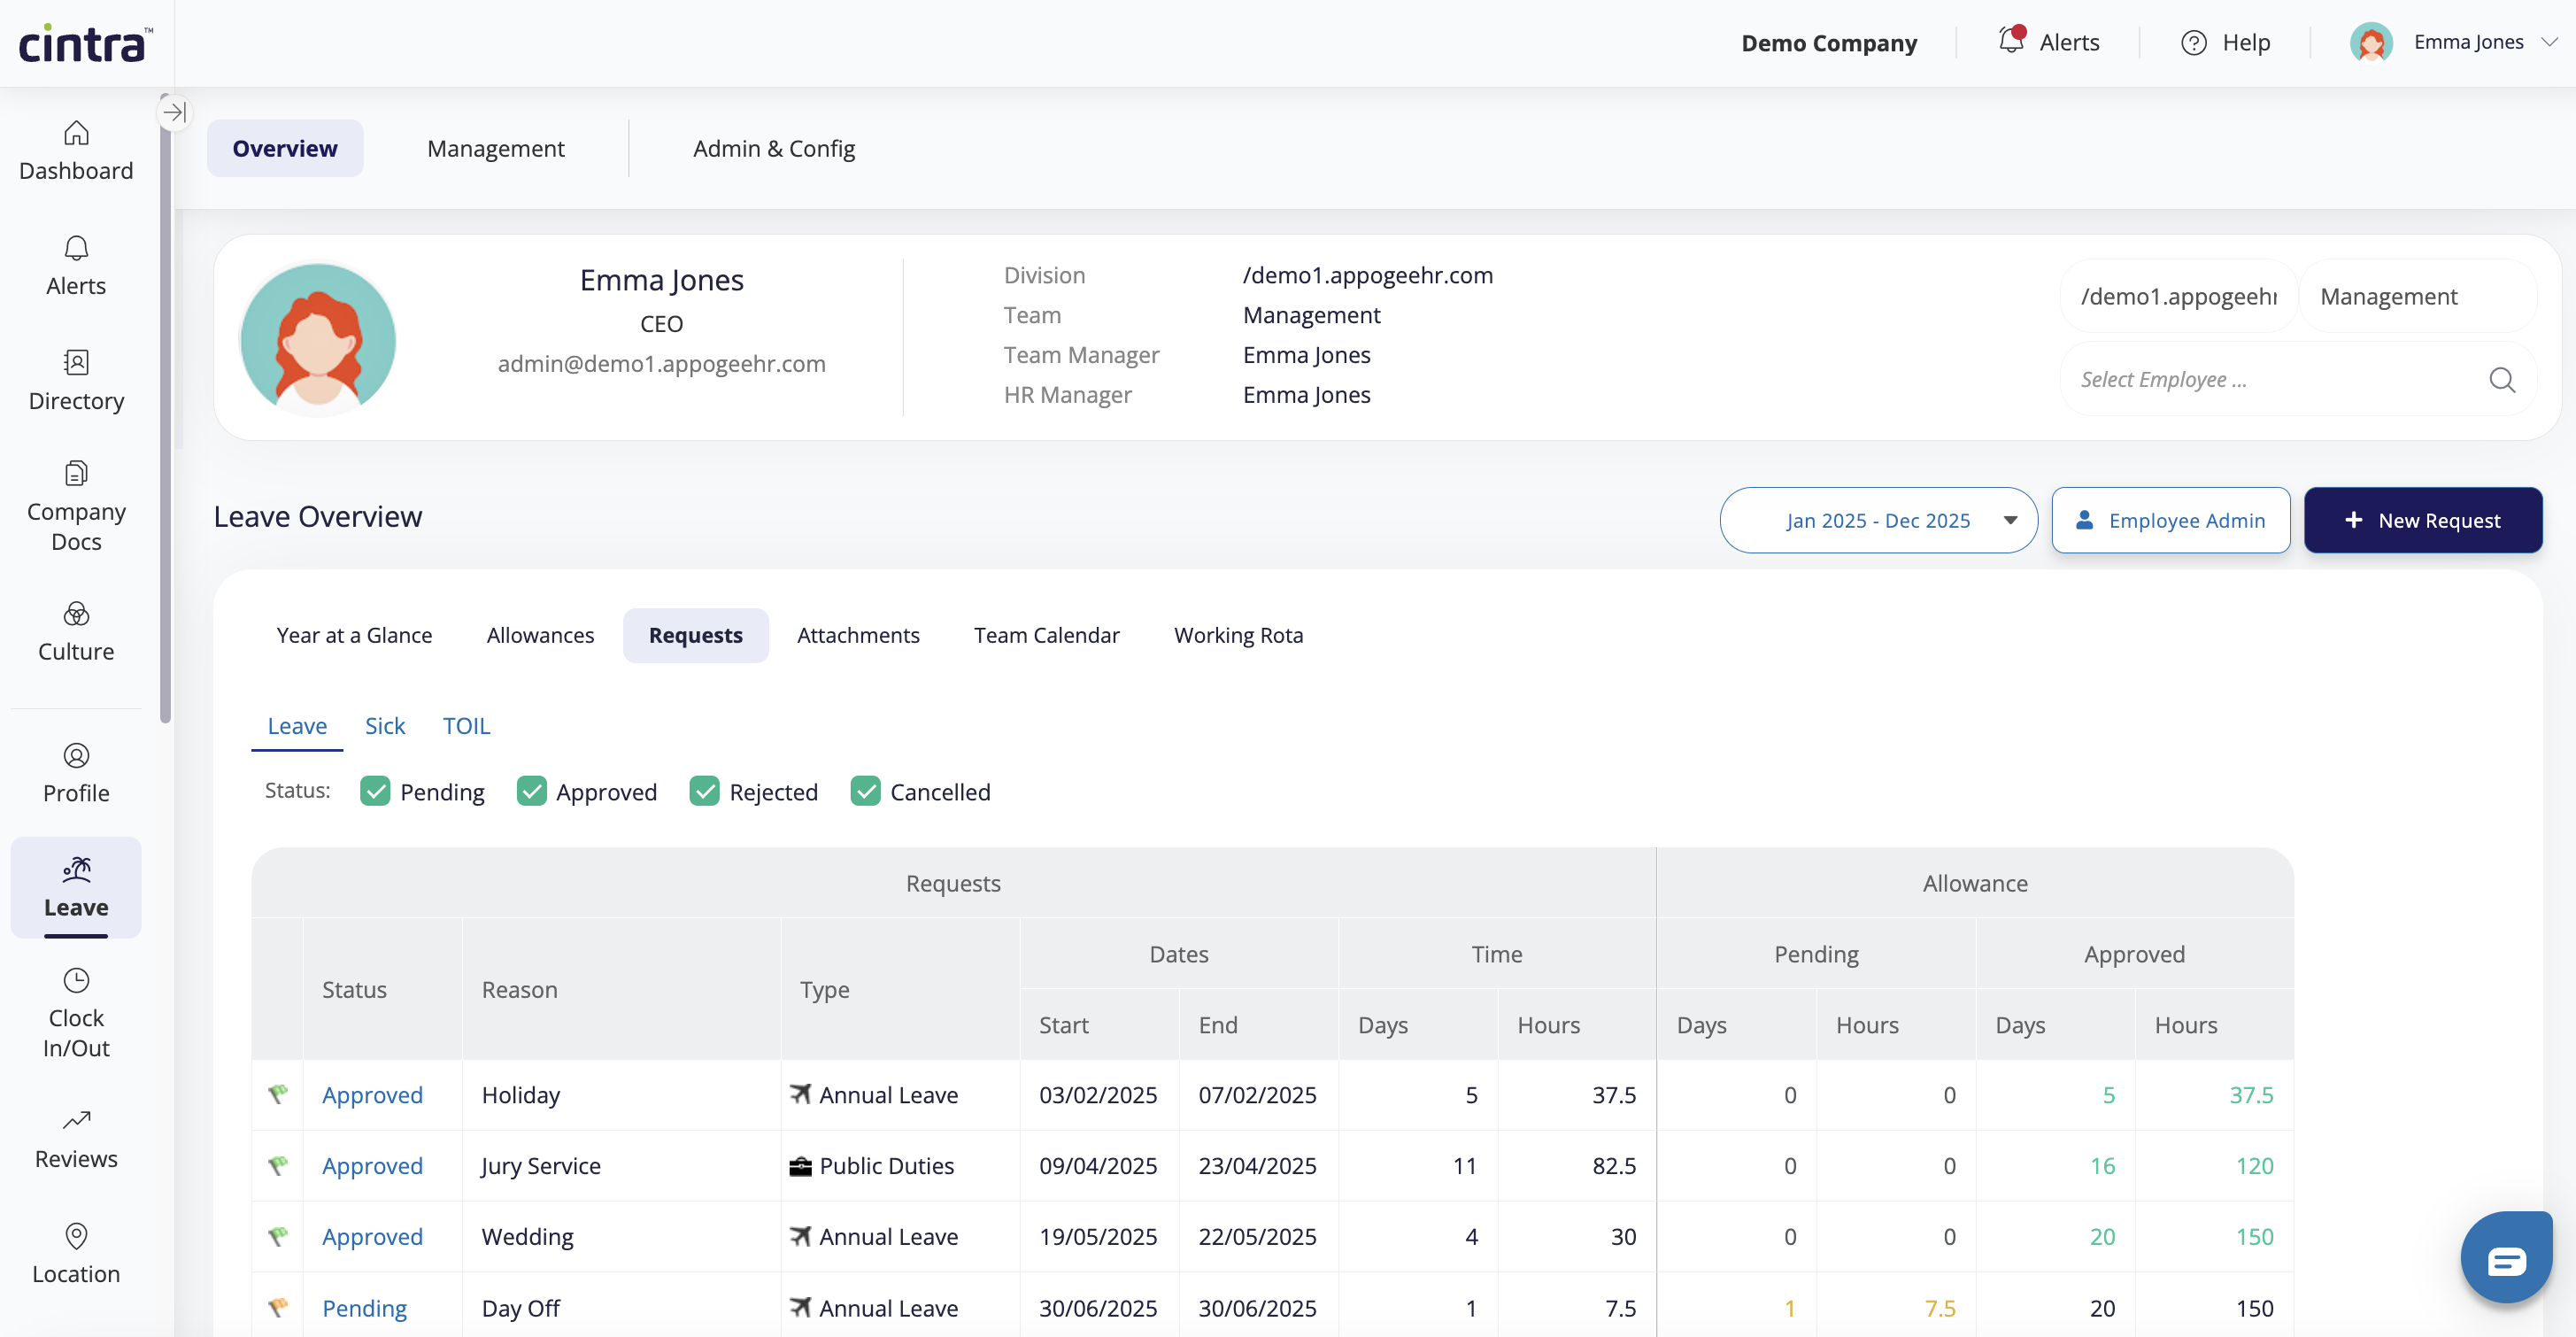
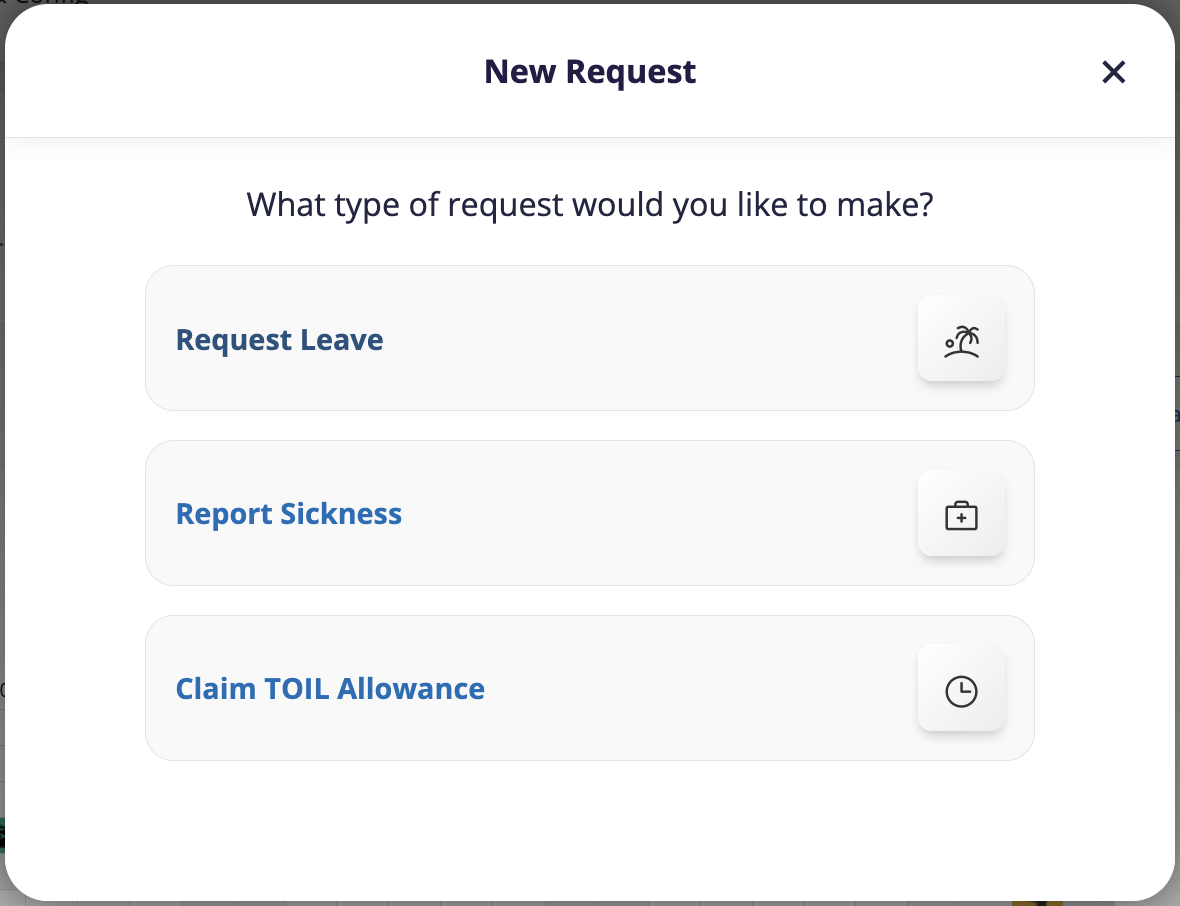
Leave Requests can be submitted in more than one way.
From the Dashboard, click on the date in the Year at a Glance calendar, the New Request button in the top right corner, or the + button at the top of the menu.
Submitting a Leave Request
Select your request type as Leave and you'll be directed to the next screen. Here you can edit the details of the request. If you've clicked on the date in the calendar, you'll see the below screen, if not, you'll be asked to enter the dates first.
Fill out the form as below:
- Type of Leave - your system may be configured so you can select from the dropdown the type of Leave you wish to take
- Dates - Enter a start and end date. You may also have the option to select whether your Leave is Full day or Half day

Check everything on this page is correct, then click Next.
You may be required to enter a reason for your Leave Request, type in the box and click Next.
If you're integrated with Google Workspace, you may be able to configure your out of office here too. You can also add attachments to the request. This may be set as mandatory for your organisation.
The next screen will show a summary of your request, check this is accurate and click Submit Request.
You'll notice your calendar has updated with the Leave request and this will show in yellow as pending until it has been approved, when it will turn green.
Reporting Sickness and Returning to Work
Select your request type as Sickness and you'll be directed to the next screen. Here you can edit the details of the request. If you've clicked on the date in the calendar, you'll see the below screen, if not, you'll be asked to enter the dates first, and then you'll be taken to the below screen.
Fill out the form as below:
- Type of Sickness - choose the type of sickness form the dropdown
- Dates - enter a start and end date. You may also have the option to select whether your Sickness is Full day or Half day.
- If you are still sick, untick the 'have you returned to work box'. This will created an open report.
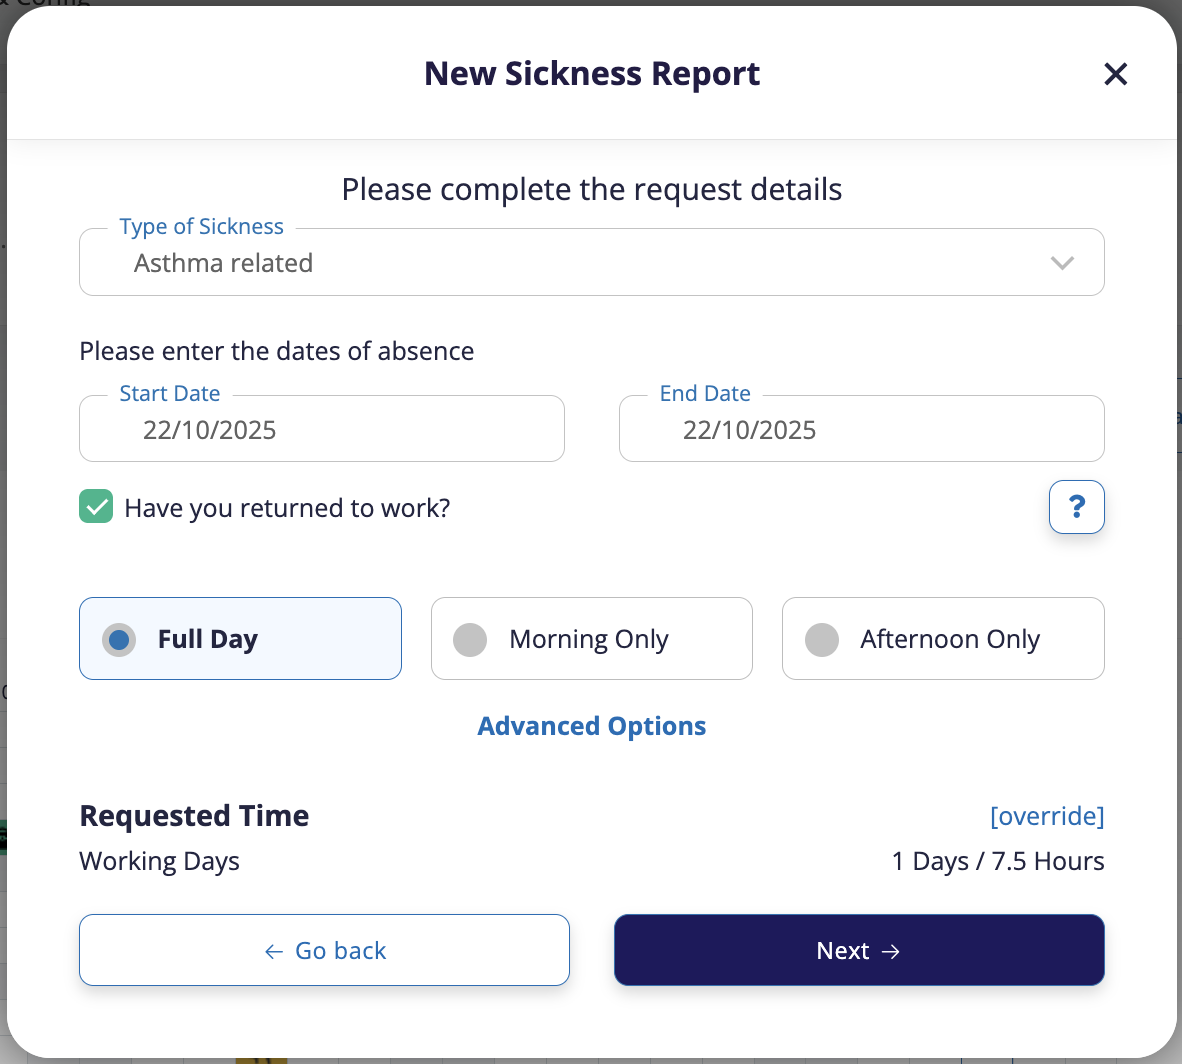
Check everything on this page is correct, then click Next.
You may be required to enter a reason for your Sickness Report, type in the box and click Next.
If you're integrated with Google Workspace, you may be able to configure your out of office here too.
The next screen will show a summary of your request, check this is accurate and click Submit Request.
You'll notice your calendar has updated with the Sickness Report showing in red.
Returning to work
If you have submitted an open Sickness report, you will need to mark your return to work.

Click the button, a dialog will appear showing you the details of your Sickness Report.
Click to Return to Work.
Depending on the Sickness Type and the length of your absence, you may be required to complete a Return to Work Form.
Submitting a Return to Work Fom
If you need to submit a Return to Work form, the Sickness dialog box will show you this information in the yellow box.

Click the Submit Request button, then Open Return to Work Form.

Fill out the boxes with the required information and attach a file if requested.

When you've completed the form, click Submit.
IF you have more than one Manager for your Team, you will be prompted to select the correct one you'd like the Return to Work Form to go to.

Your approver will be notified of your return.

Attachments
It may also be possible for you to add attachments to your Leave Requests. This is likely to be a supporting document to give to your approver to aid your Request, e.g. a doctor's note or Jury Service letter. If enabled by your Admin, you will be able to add this attachment at the point of request, or within the Request at a later date.
Upon making a Request, you will be given a tick box to attach files, click this and a Drag & Drop / Browse box will appear. You can upload your attachment as a file saved on your computer.

You can also go into the Request at any time and add an attachment to it. Open the Request either from the Year at a Glance, or the Requests option on the menu. If enabled, you will see an Attachments tab, where you will be able to upload a file from your computer.